TLDR; Items needed: iPhone with Live Photo (iPhone 6 or later), iOS 11 or later installed. Using the native photo app, enable live photo, take a photo with a moving light source (a car for example), and edit the photo from live to long exposure.
I've been slightly obsessed with long-exposure light trails recently. This effect is created by increasing the time the shutter remains open. This allows more light to hit the sensor but also distorts the light if it comes from a moving source such as a vehicle's headlights. Taking long-exposure photos with a DSLR or Mirrorless requires a tripod or a stable surface on which to position the camera. If the camera shakes while the shutter is still open, you end up with a distorted image of the entire scene, not just the moving lights.
If you don’t have a fancy rig, you can get respectable results with your iPhone by following these steps:
- Grab an iPhone (6 or later) with iOS 11 or later installed.
- Open the camera app
- Enable Live Photo (upper right corner). Make sure you're in the photo settings, not portrait as I was at the beginning of this clip:
4. Take a photo. For the best effects, keep the phone as still as possible. Taking photos at night with moving lights creates nice trails.
5. Open the photos app, select your photo, and switch from Live to Long Exposure (upper right corner).
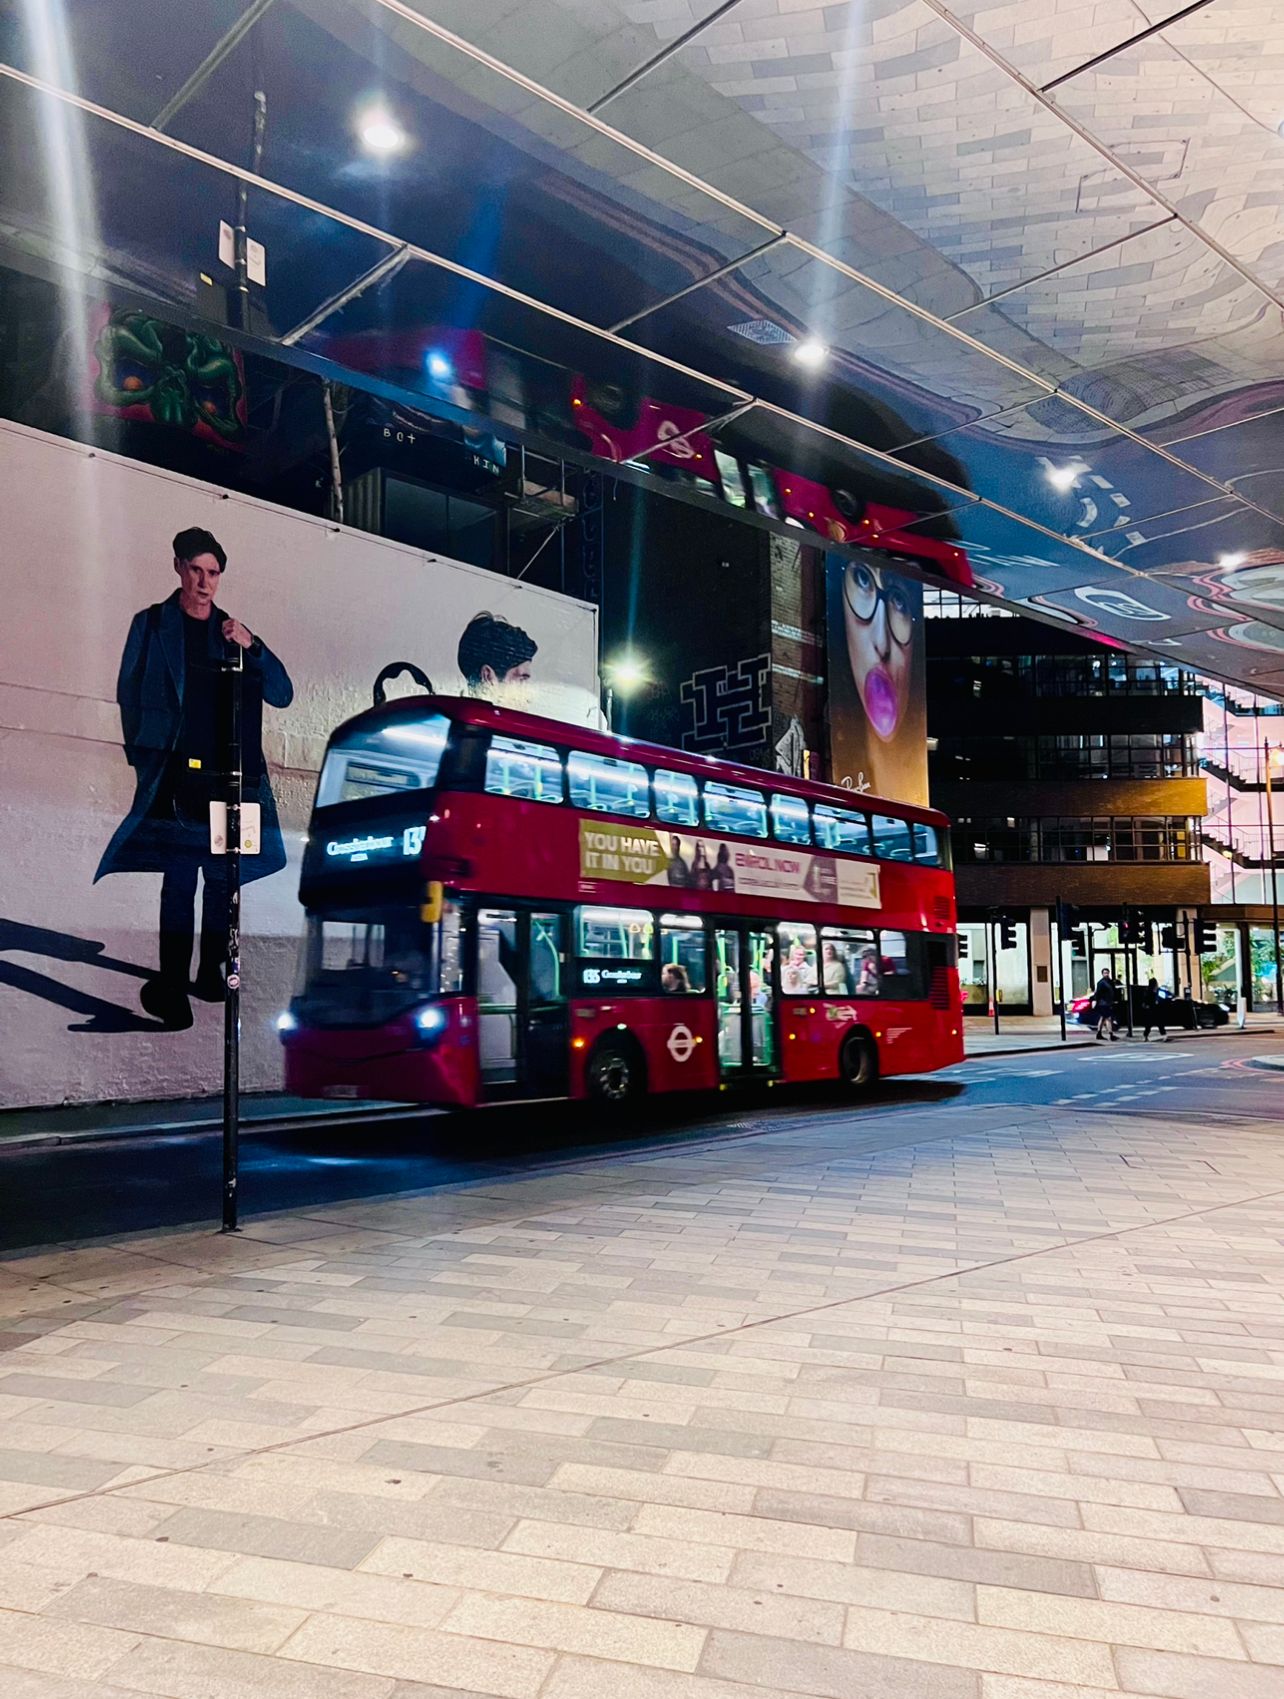
6. Viola! An example of long exposure with a double-decker bus in London: